
How To Attach Cables To Car Battery: Safe Step-By-Step Guide
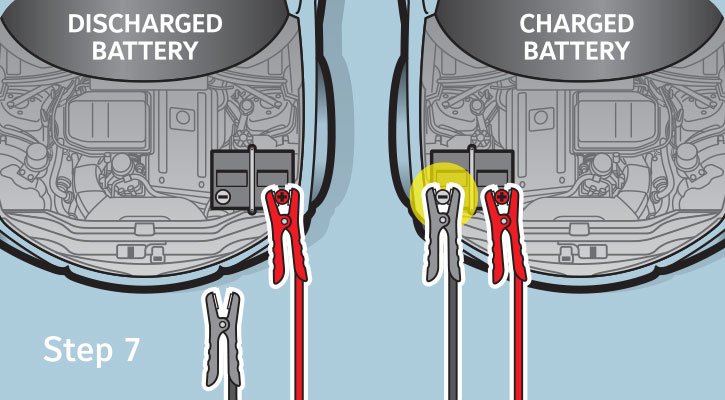
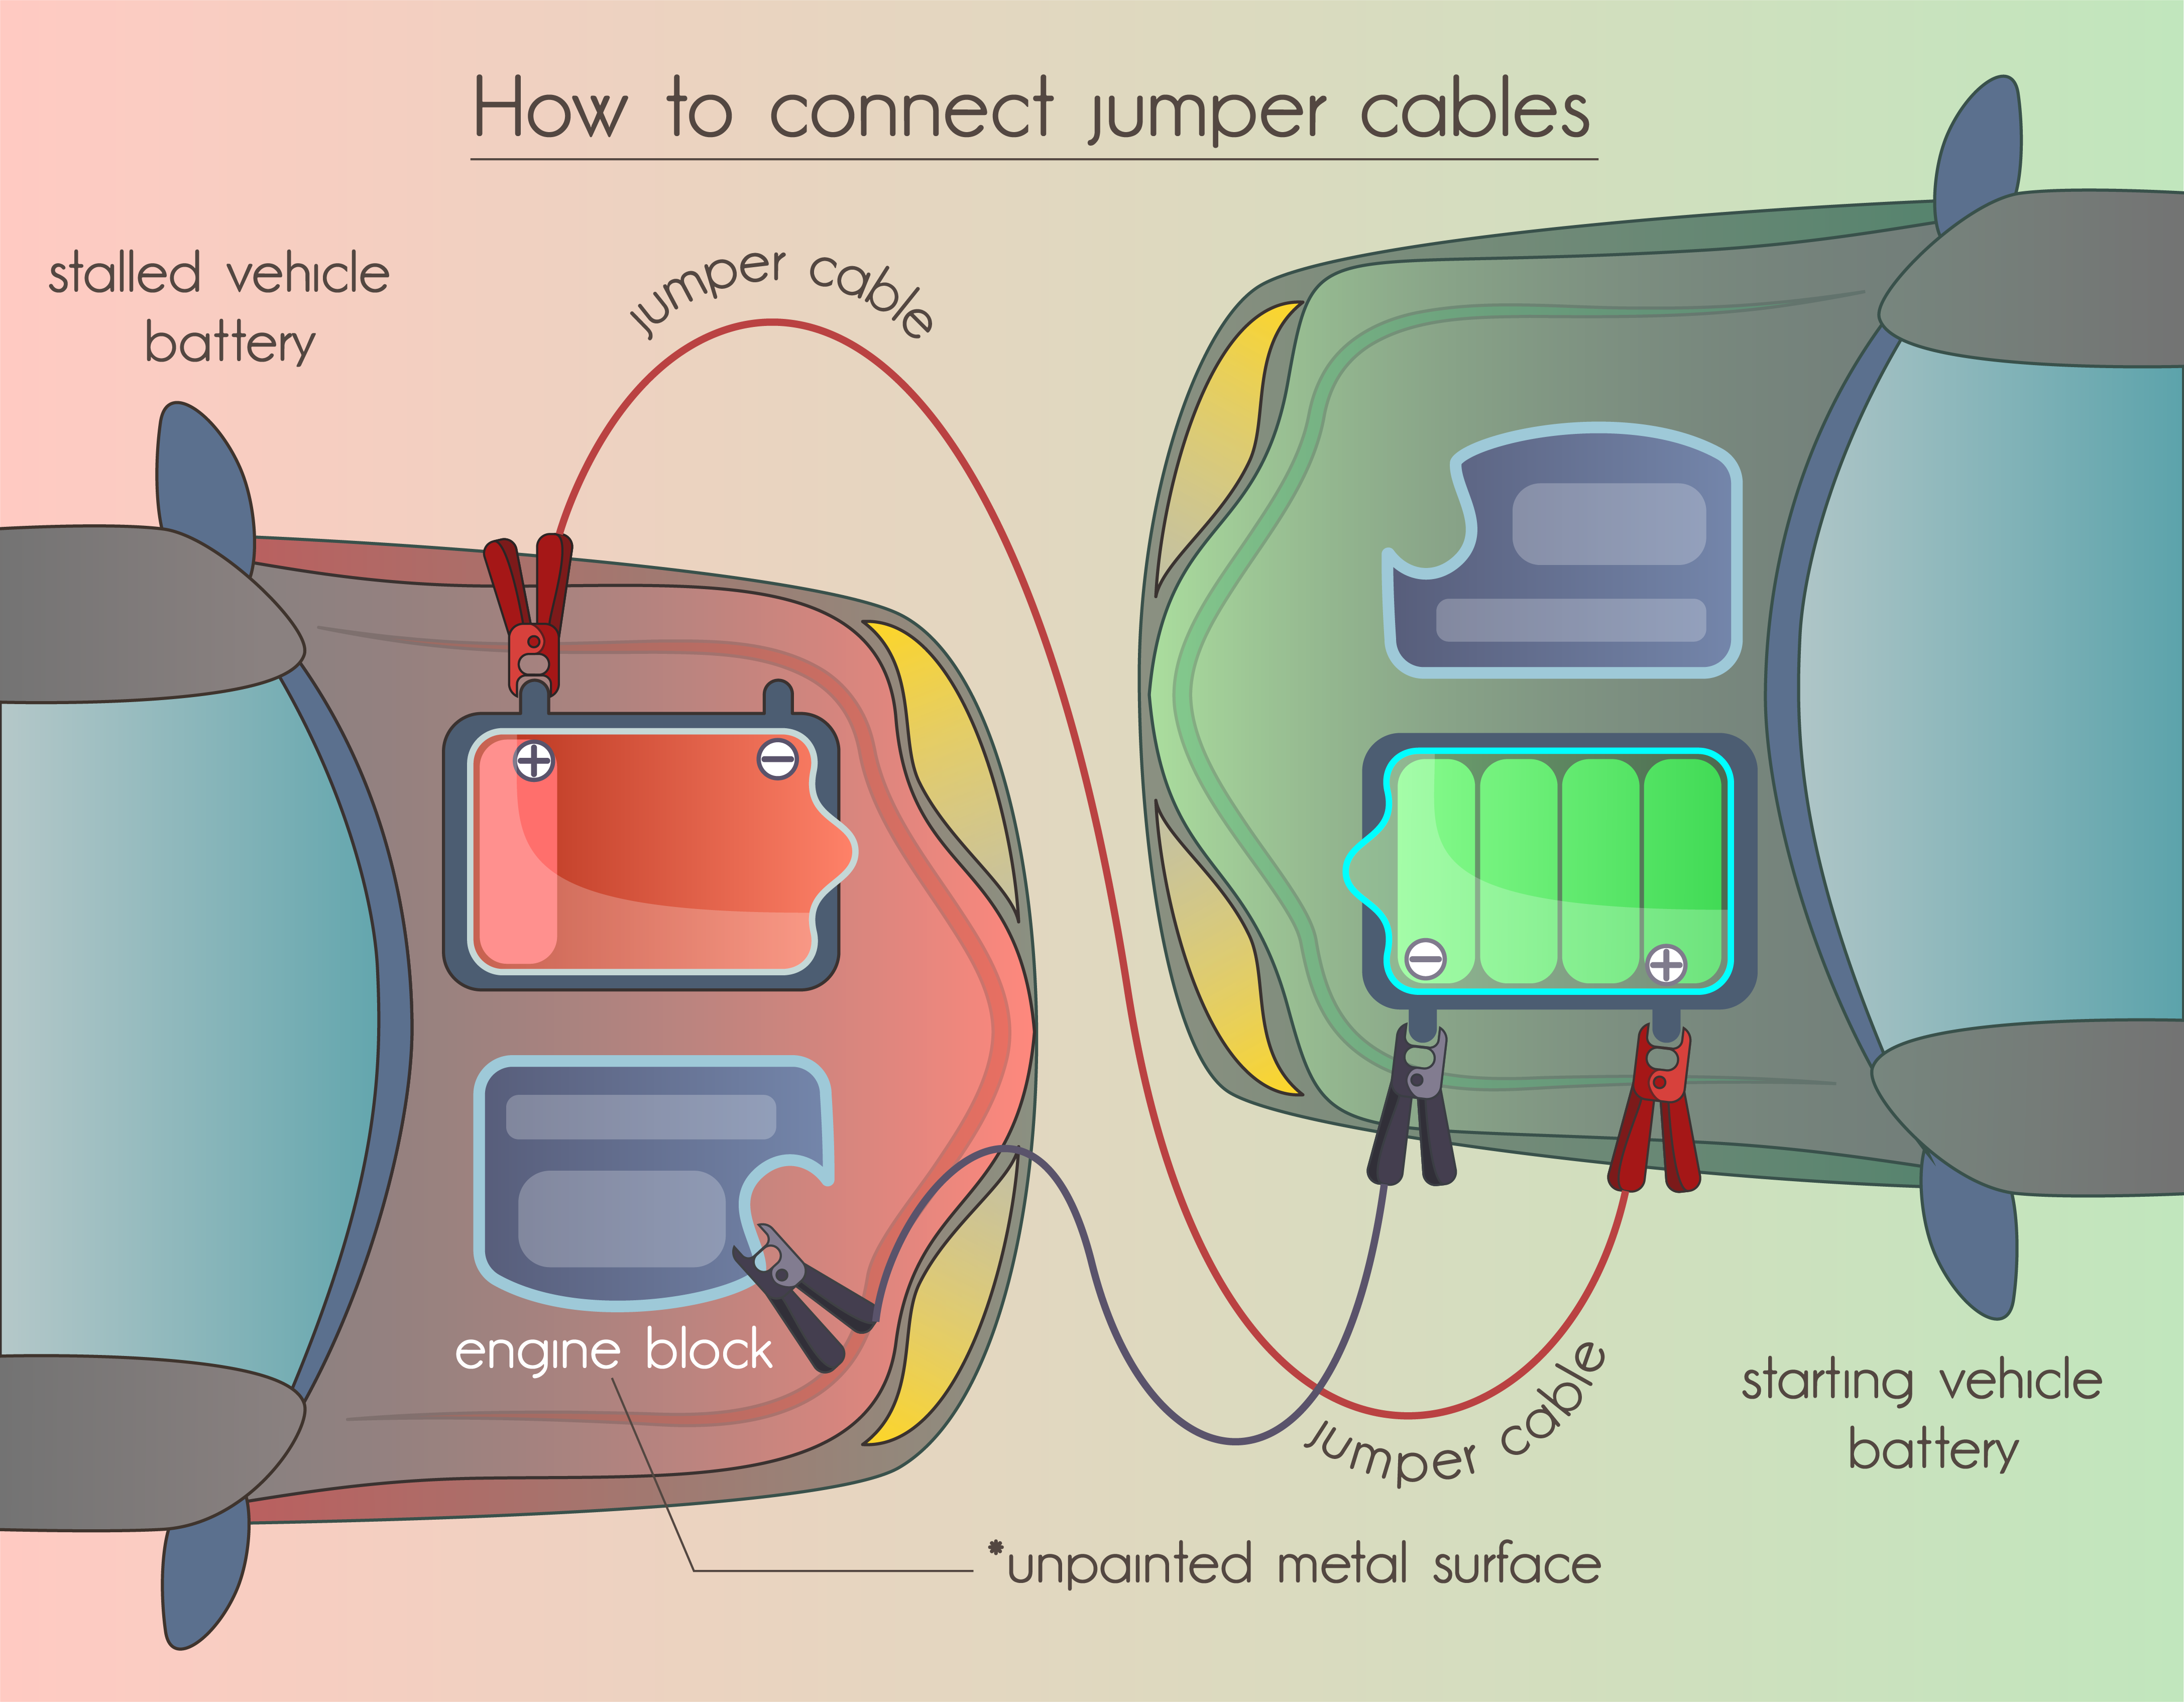
To attach jumper cables in the United States, connect the red clamp to the dead battery’s positive (+) terminal, then to the good battery’s positive (+) terminal. Connect the black clamp to the good battery’s negative (–) terminal. Attach the last black clamp to clean, unpainted metal on the dead car’s engine block or chassis—not usually to the dead battery’s negative terminal. Start the working car, then the disabled car.
Always check both owner’s manuals first. Some cars have special jump-start posts or different rules.
Key Takeaways
- Turn off both cars before attaching the cables.
- Park the cars close enough for the cables to reach, but do not let them touch.
- Connect positive cables first.
- Connect the final negative clamp away from the dead battery when the vehicle maker allows it.
- Keep the clamps from touching each other or moving engine parts.
- Remove the cables in the reverse order.
- Do not jump a battery that is cracked, leaking, badly swollen, or frozen.
- Never use this method on a high-voltage hybrid or electric vehicle battery.
What You Need Before You Start
You need a set of jumper cables, a vehicle with a charged 12-volt battery, and the disabled vehicle. Both vehicles should use compatible battery systems. Most gasoline cars and many diesel vehicles use a 12-volt battery, but the owner’s manual is the final authority.
Wear eye protection if you have it. Remove loose jewelry, keep flames and cigarettes away, and keep children away from the work area. A lead-acid battery can release flammable gas and corrosive acid.
Before connecting anything, check the batteries:
- Do not jump a battery that is cracked or leaking.
- Do not jump a battery that is frozen or covered with ice.
- Do not continue if you smell strong sulfur, see smoke, or see sparks.
- Do not use damaged cables with cracked insulation or loose clamps.
- Do not work near moving belts, fans, or pulleys.
Park the working car close to the disabled car. The cables must reach without stretching. Set both vehicles in Park or Neutral, apply both parking brakes, and turn off the ignition, lights, radio, heater, and other accessories.
The cars should not touch. On many vehicles, especially newer models, the battery may sit under a cover or in the trunk. Use the marked jump-start terminals if the manual provides them.
For guidance on your exact vehicle, use the owner’s manual. The National Highway Traffic Safety Administration also provides general vehicle safety information, but your vehicle maker’s instructions control the connection points.
How to Attach Jumper Cables Step by Step
Follow this order. The sequence reduces the chance of a short circuit and keeps the final spark away from the battery when possible.
1. Find the positive and negative terminals
Look for the symbols:
- Positive (+): often has a red cover or red cable.
- Negative (–): often has a black cable connected to the vehicle body.
- Ground point: a clean, unpainted metal part of the engine or chassis.
Do not rely only on cable color. Read the symbols on the battery or jump-start posts. Dirt and corrosion can hide the markings.
2. Attach the red clamp to the dead battery
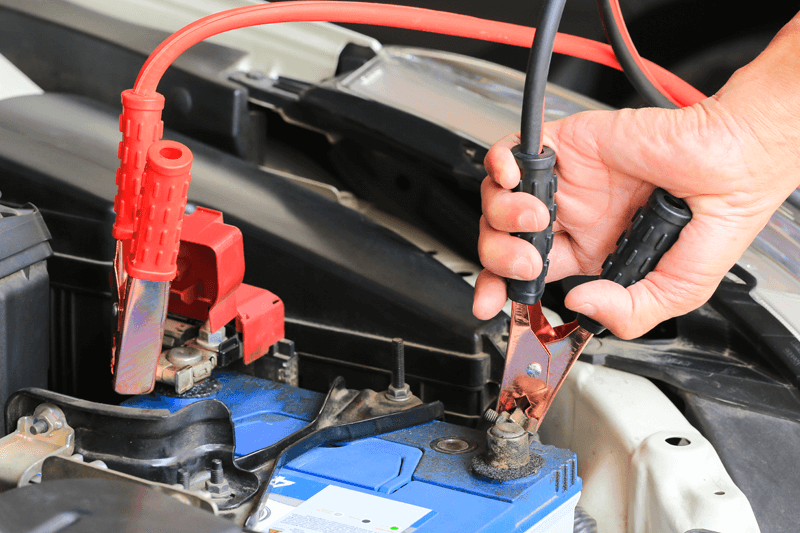
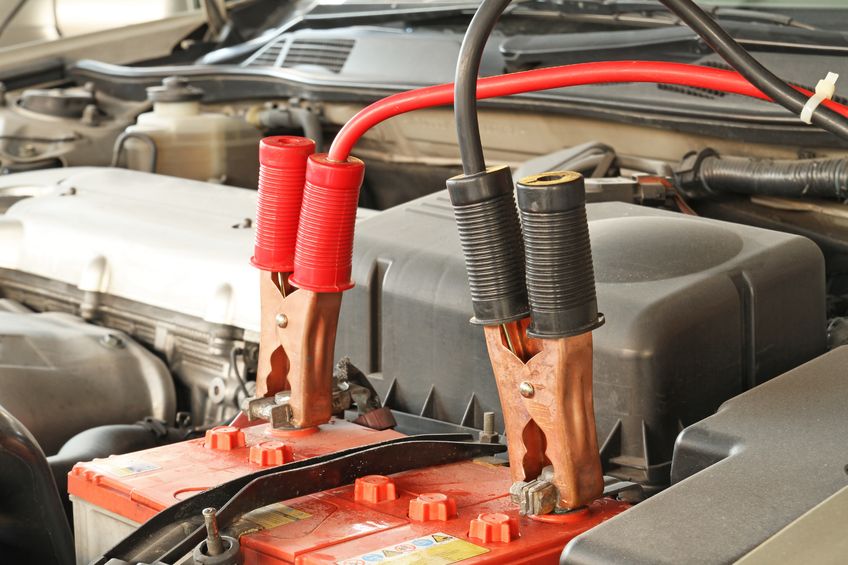
Connect one red clamp to the positive (+) terminal of the dead battery.
Make sure the clamp grips the metal post firmly. Do not let the clamp touch any other metal part.
If the car has a marked positive jump post, use that post instead of the battery terminal.
3. Attach the other red clamp to the good battery
Connect the other red clamp to the positive (+) terminal of the working battery.
Check that both red clamps are secure. The red cable now links the two positive terminals.
4. Attach the black clamp to the good battery
Connect one black clamp to the negative (–) terminal of the working battery.
Keep the black clamp away from the red clamp. If the two clamps touch, they can create a short circuit.
5. Attach the final black clamp to a ground point
Connect the last black clamp to a clean, solid, unpainted metal part of the disabled car. A heavy engine bracket or approved chassis ground often works.
Choose a point away from the battery, fuel parts, belts, fans, and other moving parts. This connection can create a small spark, so placing it away from the battery may reduce the risk of igniting battery gas.
Some vehicles require the final black clamp to connect to a specific negative post. Others prohibit a direct connection to the battery’s negative terminal. Follow the manual for that vehicle.
6. Start the working car
Start the vehicle with the good battery. Let it run for several minutes. This may allow some charge to reach the weak battery.
Keep both cars off if the owner’s manual says not to run the donor vehicle. Some vehicles have special jump-start procedures.
7. Start the disabled car
Try to start the disabled car. Do not crank the engine for more than about 10 seconds at a time. If it does not start, wait for about a minute before trying again.
If the engine starts, let both vehicles run for a few minutes. Watch for warning lights, smoke, unusual sounds, or hot cables. Turn the vehicles off if you see a problem.
How to Remove Jumper Cables
Remove the cables in the reverse order. Do not allow the clamps to touch metal or each other while you remove them.
- Remove the black clamp from the disabled car’s ground point.
- Remove the black clamp from the good battery’s negative (–) terminal.
- Remove the red clamp from the good battery’s positive (+) terminal.
- Remove the red clamp from the disabled battery’s positive (+) terminal.
Keep the cable clamps apart as you remove them. Close the hoods only after all cables are clear.
Do not switch off the newly started car right away unless the owner’s manual says to do so. Drive for about 20 to 30 minutes if the vehicle runs normally and local conditions are safe. This may add some charge, but driving does not always fully recharge a weak battery.
A battery charger can provide a better recharge. If the car needs another jump soon, have the battery and charging system tested.

What to Do If the Car Does Not Start
A failed jump does not always mean the battery is bad. Use the symptoms to guide the next safe check.
| What you notice | Possible cause | Safe next step |
|---|---|---|
| No lights or sound | Poor connection, fully discharged battery, damaged cable, or bad fuse | Turn off both cars and check clamp contact and polarity |
| A single click | Weak battery, poor cable contact, or starter problem | Recheck the clamps and try once more |
| Rapid clicking | Low voltage or a poor connection | Make sure the clamps grip clean metal |
| Engine cranks slowly | Weak battery, thin cables, cold weather, or poor connection | Let the donor car run briefly, then try again |
| Engine cranks normally but will not start | Fuel, ignition, security, or engine problem | Stop repeated jump attempts and seek diagnosis |
| Cables become hot | Too much current, poor cable size, damaged cable, or short circuit | Stop, switch off both cars, and remove the cables |
| Sparks continue or smoke appears | Wrong connection, short circuit, or damaged battery | Stop immediately and move away from the vehicles |
If the battery posts are dirty, turn off both vehicles and clean only the contact area with a battery-terminal brush. Do not scrape aggressively, and do not create a spark near the battery.
A battery that starts only with a jump may have lost its ability to hold a charge. The problem could also come from a failing alternator, a loose connection, corrosion, or an electrical drain.

Common Mistakes to Avoid
Connecting positive and negative backward
Reverse polarity can damage electronic modules, fuses, alternators, and batteries. Check the + and – symbols before every connection.
Connecting the final black clamp directly to the dead battery
Many standard jump-start procedures use an engine or chassis ground for the final black clamp. This can keep a connection spark farther from battery gas. However, some vehicles specify a battery terminal or a special post instead.
The vehicle manual decides the correct connection point.
Letting the cars touch
If the vehicles touch, current may travel through unintended paths. Keep them separate.
Trying to start the engine with cables attached incorrectly
Stop if you see heavy sparks, smoke, melting insulation, or hot clamps. Turn off both vehicles and correct the setup only after checking the manual.
Using a small vehicle to jump a large vehicle
A small car may not provide enough current for a large truck, diesel vehicle, or deeply discharged battery. Use a properly rated jump pack or a suitable donor vehicle.
Jump-starting a hybrid or electric vehicle incorrectly
A hybrid or electric vehicle may have a normal 12-volt battery, but it also contains a high-voltage system. The 12-volt battery may power the vehicle controls, but it is not the traction battery.
Never connect jumper cables to orange high-voltage cables or high-voltage battery parts. Use only the 12-volt jump points listed in the manual. Do not use one electric vehicle to charge another unless both manufacturers specifically allow it.
Assuming a jump fixes the problem
A jump starts the engine. It does not repair a failing battery, alternator, starter, or wiring fault. If the issue returns, get a battery and charging-system test.

Can You Attach Jumper Cables to a Car in the Rain?
A light rain does not usually prevent a jump-start when the battery, cables, and connection points are in good condition. Water does not replace the need for correct polarity or safe handling.
Avoid jump-starting during flooding, standing water, lightning, or severe weather. Keep the cable clamps out of puddles. Do not touch wet electrical parts with damaged cables or exposed wires.
Snow and cold weather can reduce battery power. If the battery may be frozen, do not jump it. A frozen battery can crack or fail when current enters it.
How Long Should You Leave Jumper Cables Connected?
After the donor vehicle starts, let it run for a few minutes before trying the disabled vehicle. The exact time depends on the battery condition, cable size, temperature, and vehicle instructions.
Do not leave the cables connected for a long time as a substitute for charging. If the disabled vehicle starts, remove the cables in reverse order. Then drive safely or use a battery charger.
A battery charger is usually the better choice when:
- The battery is deeply discharged.
- The car will sit for several days.
- The battery has repeatedly gone dead.
- The vehicle has sensitive electronic systems.
- You have access to a safe power source.
When to Call for Roadside Assistance
Call for help instead of attempting a jump when:
- The battery is cracked, leaking, swollen, or frozen.
- The vehicle has been in water.
- You cannot identify the terminals.
- The cables do not reach safely.
- The car uses a special jump procedure you do not understand.
- The engine bay has smoke or a fuel leak.
- The vehicle still will not start after a correct attempt.
- You suspect a high-voltage hybrid or electric system problem.
Roadside technicians can use a jump pack, test the battery, and check the charging system. They can also prevent damage when a vehicle has unusual terminals or a manufacturer-specific procedure.
Frequently Asked Questions
Which cable goes on first when jumping a car?
Connect the red positive cable first. Attach it to the dead battery’s positive terminal, then to the good battery’s positive terminal. Next, connect the black cable to the good battery’s negative terminal and the final black clamp to the disabled car’s approved ground point.
Which cable comes off first after a jump-start?
Remove the cable from the disabled car’s ground point first. Then remove the black clamp from the good battery, followed by the red clamp from the good battery and the red clamp from the disabled battery.
Can I connect the black jumper cable to the dead battery?
Only if the vehicle maker’s instructions allow it. Many standard procedures place the final black clamp on clean, unpainted engine or chassis metal. Some vehicles use a designated negative jump post.
Why does my car still not start after a jump?
The cause may be a bad battery, weak cable connection, failed alternator, faulty starter, blown fuse, or an engine problem. If the engine cranks normally but does not run, the battery may not be the main issue.
Can a jump-start damage my car?
Yes. Incorrect polarity, loose connections, shorted clamps, or the wrong jump points can damage fuses and electronic parts. Follow the owner’s manual and stop if the cables spark heavily, smoke, or become hot.
Final Checklist
Before you try to start the disabled vehicle, confirm:
- Both vehicles are off.
- The cars do not touch.
- The red clamp is on the dead battery’s positive terminal.
- The other red clamp is on the good battery’s positive terminal.
- The black clamp is on the good battery’s negative terminal.
- The final black clamp is on the approved ground point.
- The clamps are secure and separated.
- The cables are away from belts, fans, and hot parts.
- Neither battery is cracked, leaking, swollen, or frozen.
If the car starts, remove the cables in reverse order and have the battery tested if the problem returns.