
How To Mount License Plate To Front Of Car: Easy Guide
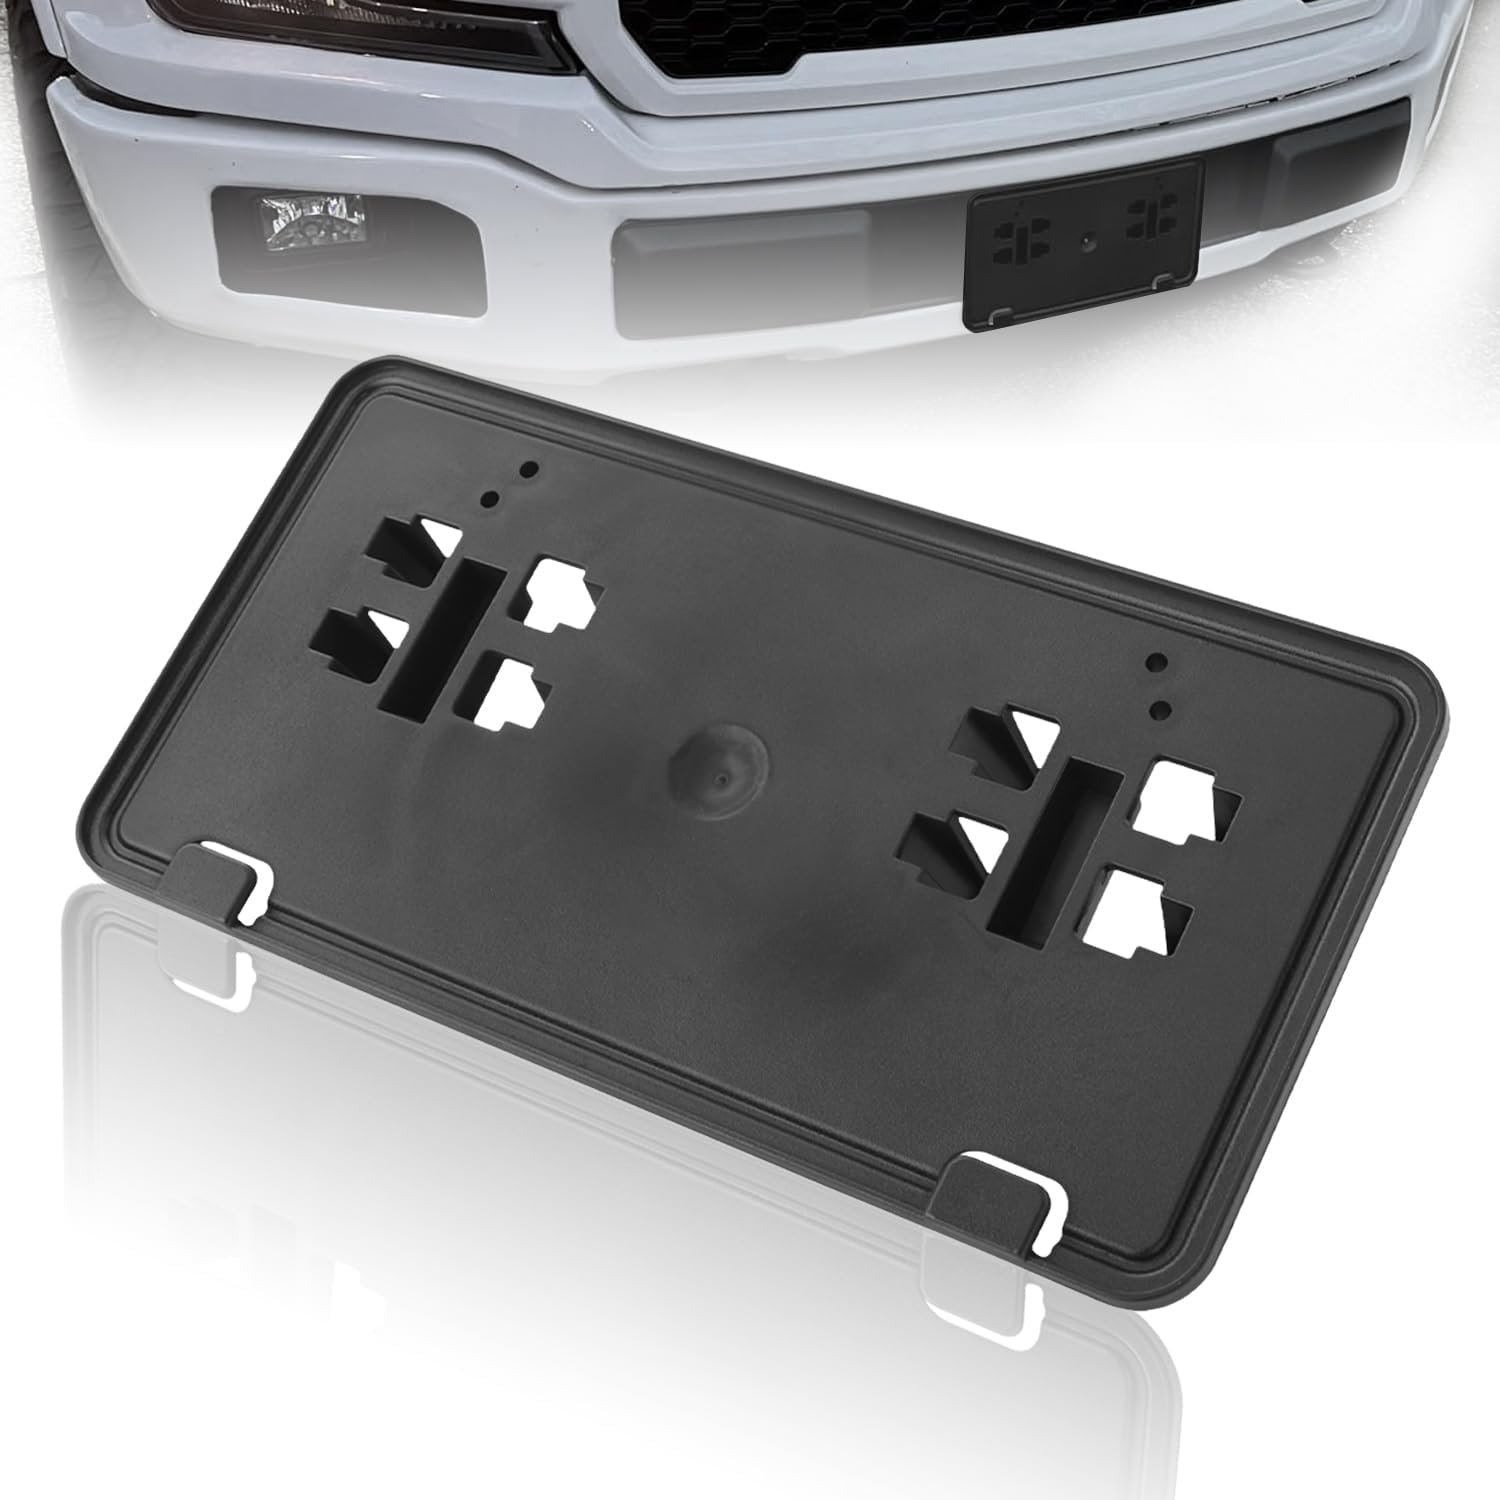
For cars registered in the United States, the safest way to mount a front license plate is to use the vehicle’s factory bracket or a vehicle-specific front plate mount. If your car has no bracket, choose a mount made for that exact model before drilling or using adhesive. First check your state’s Department of Motor Vehicles (DMV) rules, because some states require a front plate while others do not.

Check Your State and Vehicle First
Front license plate laws vary across the United States. Many states require both a front and rear plate, while others issue or require only a rear plate. Some states also set rules for plate height, angle, visibility, covers, and mounting location.
Check your state DMV or motor vehicle agency before installing the plate. Search for the official state website and confirm:
- Whether your vehicle must display a front plate
- Whether the plate must be on the vehicle’s center line
- How clearly the plate must be visible
- Whether plate covers, frames, or tinted shields are allowed
- Whether temporary mounting is allowed
- Whether special vehicles have different rules
Your vehicle owner’s manual is also useful. It may show the factory mounting points, screw size, and safe drilling areas.
Common front plate mounting locations
Most vehicles use one of these locations:
- Factory front bracket: Usually the easiest and cleanest option.
- Bumper mounting holes: Common on many cars and trucks.
- Lower grille area: Used when the main bumper has no holes.
- Tow-hook mount: Useful on some cars with a built-in tow-hook opening.
- No-drill mount: Uses existing seams, grille points, or a special model-specific bracket.
- Adhesive mount: A limited option that may not be secure or legal in every situation.
Do not assume that a flat part of the bumper is safe to drill. Behind the bumper may be a parking sensor, radar sensor, wiring harness, airbag sensor, washer tank, or reinforcement bar.

What You Need to Mount a Front License Plate
The exact tools depend on your car and the type of mount. Gather the parts before you begin.
Basic tools and supplies
You may need:
- Front license plate
- Vehicle-specific front plate bracket or mount
- Correct license plate screws
- Screwdriver or driver bit
- Drill and small drill bit, only if drilling is approved
- Measuring tape or ruler
- Painter’s tape
- Pencil or washable marker
- Level
- Center punch, if drilling into metal
- Trim removal tool, if required
- Rust protection for exposed metal
- Thread-locking compound, if the mount maker allows it
Use screws that match the bracket and the vehicle. Do not force a screw into a threaded hole. A screw that is too long can damage parts behind the bumper.
Choose the mount based on the vehicle
The best mount depends on the front end of the car:
| Vehicle condition | Suitable mounting choice | Main concern |
|---|---|---|
| Factory holes or bracket present | Factory bracket or direct-fit bracket | Use the original screw points |
| Smooth bumper with no holes | Model-specific no-drill or approved drill mount | Check behind the bumper first |
| Front radar or parking sensors nearby | Offset or vehicle-specific mount | Do not block the sensor field |
| Tow-hook opening available | Tow-hook plate mount | Confirm it fits and does not block the opening |
| Active grille or cooling opening | Alternate bracket location | Do not restrict airflow |
| Temporary registration plate | Secure temporary mount allowed by local rules | Prevent loss or poor visibility |
A universal bracket can work, but it may require extra adjustment. A vehicle-specific bracket usually reduces the risk of blocked sensors, poor fit, or damage to the bumper.

How to Mount a Front License Plate Using Factory Holes
Using factory holes is usually the simplest method. It avoids drilling and keeps the plate in the location chosen by the vehicle maker.
1. Park on a level surface
Park the car on level ground. Turn off the engine and set the parking brake. If you must work near the road, move the car to a safe driveway or garage.
Clean the bumper and the back of the plate. Dirt can hold the plate away from the bracket and may cause it to loosen.
2. Find the factory mounting points
Look for:
- Threaded holes in the bumper
- Plastic inserts
- A factory plate bracket
- Small covers over the mounting points
- A grille bracket or support bar
Check the owner’s manual if the holes are hard to find. Do not remove bumper trim unless the manual or bracket instructions show how to do it.
3. Hold the plate in position
Place the plate or bracket over the mounting points. Make sure:
- The plate is upright
- The text can be read from the front
- The plate is not bent
- The plate does not cover a sensor
- The plate does not block an air intake
- The plate does not touch the paint in a way that could cause rubbing
Use a level if the bumper shape makes alignment hard to judge.
4. Start each screw by hand
Insert each screw a few turns by hand. Starting all screws before tightening helps prevent the bracket from shifting.
If a screw will not turn easily, stop. The hole may need a different screw, an insert, or a clip nut. Do not use force.
5. Tighten the screws evenly
Tighten the screws until the plate or bracket is firm. Do not crush the plastic bumper or twist the plate.
Vehicle makers and bracket makers may specify a torque value. Follow that value when one is provided. If there is no specification, use firm hand pressure with a normal screwdriver rather than a high-power impact driver.
6. Check the finished mount
Gently push the plate from several directions. It should not rattle, swing, or move out of position.
Drive a short distance, then check the screws again. Recheck the mount after a few trips, especially if the bumper is flexible.
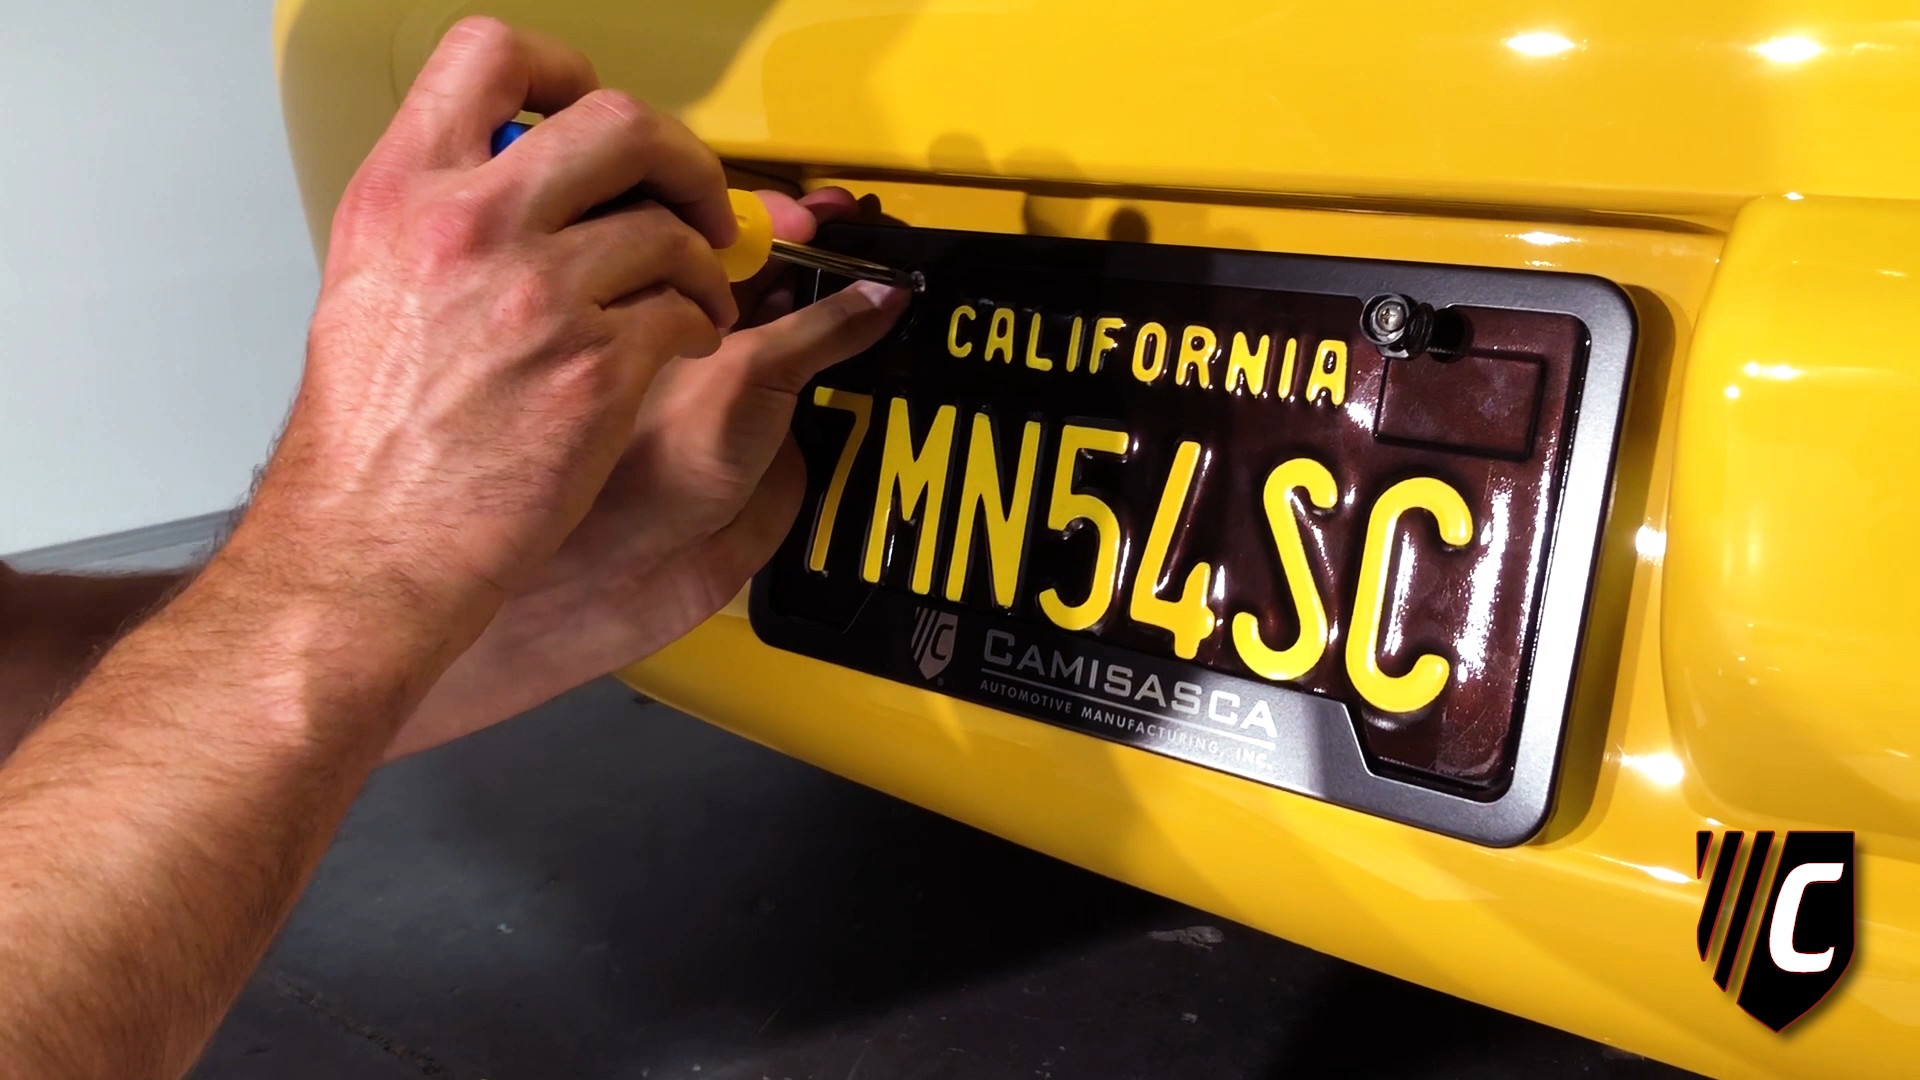
How to Mount a Front License Plate Without Factory Holes
If your car has no front plate holes, do not drill by guesswork. Start with a no-drill or vehicle-specific mount. These products often attach to an existing tow-hook opening, grille structure, bumper seam, or other approved point.
Option 1: Use a vehicle-specific no-drill bracket
A model-specific bracket is designed for the shape of a certain bumper. Follow the instructions for that mount because the attachment method can differ.
The bracket may use:
- Existing factory fasteners
- A tow-hook receiver
- A grille support
- A bumper seam
- A lower trim opening
- A clamping point behind the bumper
Check that the bracket does not press against painted surfaces. Add a thin protective pad only if the mount instructions permit it. A loose pad can trap water and dirt, so inspect it from time to time.
Option 2: Use a tow-hook mount
Some cars have a threaded tow-hook opening behind a small bumper cover. A tow-hook plate mount screws into that opening.
Before using one, confirm that:
- The mount is made for your vehicle’s tow-hook thread
- The plate does not block a parking sensor
- The plate does not cover a cooling opening
- The mount is tight and does not rotate
- The bumper cover can be stored safely
- The mount does not interfere with towing or recovery equipment
Do not guess the thread size. Vehicle manufacturers use different thread sizes and pitches.
Option 3: Drill the bumper only after inspection
Drilling can provide a strong mount, but it may damage the bumper or hidden equipment. Use this method only when the vehicle maker, bracket instructions, or a qualified installer confirms that drilling is suitable.
Before drilling:
- Remove or inspect the rear side of the bumper if needed.
- Identify wires, sensors, brackets, and reinforcement bars.
- Mark the plate center line.
- Place painter’s tape over the drilling marks.
- Hold the bracket in place and confirm its position.
- Use the correct drill bit for the bumper material.
- Drill small pilot holes first.
- Protect exposed metal from rust.
- Install the correct inserts, clips, or screws.
- Tighten the bracket without crushing the bumper.
If you cannot see what is behind the drilling area, do not drill there.
Option 4: Use adhesive mounting carefully
Adhesive mounts are not equal to a mechanical fastener. Heat, cold, rain, road salt, car washes, dirt, and wax can reduce adhesion.
If you use an adhesive mount:
- Confirm that local law allows the mounting position
- Use only a product rated for exterior automotive use
- Clean the surface with the product maker’s recommended cleaner
- Do not apply it to wax, loose paint, textured dust, or wet plastic
- Follow the required cure time
- Test the plate by hand before driving
- Inspect it often
Adhesive mounting is a poor choice if the plate could fall off or become hard to read. A mechanical bracket is usually more dependable.

Keep the Front Plate Clear and Legal
A secure plate can still be illegal if it is blocked or hard to read. Mount the plate so that all letters, numbers, state markings, and registration details remain visible.
Avoid:
- Tinted plate covers
- Reflective covers that create glare
- Decorative frames that hide letters or state names
- Plates mounted behind dark grilles
- Plates placed at a sharp angle
- Plates that hang by one screw
- Plates covered by a winch, tow strap, or bumper guard
- Plates placed in front of radar or parking sensors
- Mounts that let the plate flap in the wind
A frame may be legal if it does not cover required information. Because rules differ, check your state’s current law rather than relying on a frame seller’s claim.
Sensor and safety concerns
Modern cars may use equipment behind the front bumper, including:
- Parking sensors
- Forward collision sensors
- Adaptive cruise radar
- Camera systems
- Airbag sensors
- Active grille shutters
- External temperature sensors
The plate itself may interfere with a sensor if it sits in the sensor’s viewing area. A bracket can also move the plate closer to the sensor than the original design allows.
If the vehicle displays a warning after installation, remove the plate mount and check the area. Follow the owner’s manual. A dealer or qualified automotive technician should inspect the system if the warning remains.

How to Stop a Front License Plate From Rattling
A rattling plate usually means the plate, bracket, screw, or bumper is moving. Find the movement before adding parts.
Try these checks:
- Tighten loose screws evenly.
- Check whether the screw heads fit the plate holes.
- Replace missing rubber washers or spacers if the mount maker allows them.
- Confirm that the bracket is not cracked.
- Check for a missing plastic insert or clip nut.
- Make sure the plate is not touching the bumper edge.
- Look for a bent plate.
- Replace stripped screws or damaged inserts.
- Confirm that the bracket is not rotating at a tow-hook opening.
Do not use thick foam as a substitute for a secure mount. It may hide movement for a short time but can hold water and dirt against the paint.
If the plate keeps moving, replace the bracket. A stable mount is better than repeatedly tightening a damaged one.

When You Should Ask a Professional for Help
You can usually install a front plate with basic tools when factory holes are present. Get professional help when the job involves hidden vehicle systems or structural parts.
Ask a dealer, body shop, or qualified automotive technician for help if:
- The bumper must be removed
- The car has front radar or advanced driver-assistance systems
- You need to drill but cannot inspect behind the bumper
- The bumper is cracked or loose
- The plate mount may affect an airbag sensor
- The tow-hook opening is damaged
- The vehicle is leased and drilling may violate the lease terms
- The car has a custom body kit
- The mount instructions conflict with the owner’s manual
A professional can also check whether a bumper repair or sensor calibration is needed after installation.

Front License Plate Mounting Mistakes to Avoid
The most common errors are simple to prevent.
Drilling without checking behind the bumper
A short screw can still damage wiring or a sensor. Inspect the area before drilling.
Using the wrong screw
A screw that is too large can split plastic. One that is too long can reach hidden parts. Use the hardware listed for the bracket or vehicle.
Mounting over a sensor
The plate may trigger a warning or reduce sensor performance. Keep the sensor area clear.
Using only one screw
One screw lets the plate rotate and creates stress on the mount. Use all required mounting points.
Overtightening
Too much force can crack plastic, strip threads, or bend the plate. Tighten until secure, not until crushed.
Trusting a universal mount without measuring
A universal mount may sit too high, too low, too far forward, or over a sensor. Check fit and visibility before buying.
Forgetting the state rules
A plate that looks fine may still violate a rule about covers, height, angle, or visibility. Confirm the current rule with your state agency.

Quick Installation Checklist
Before driving, confirm each item:
- The state requires or permits the chosen front mounting method.
- The plate is upright and easy to read.
- All required screws are installed.
- The plate does not move when pushed by hand.
- The mount does not block a sensor or air intake.
- No screw touches hidden wiring or vehicle equipment.
- No sharp edge is exposed.
- The plate does not rub against the paint.
- The bracket instructions and owner’s manual were followed.
- The plate remains secure after a short test drive.
Signs of a successful installation
The installation is ready when the plate sits flat or in the intended position, stays secure, remains visible, and does not produce a warning light or unusual noise.

Key Takeaways
- Check your state DMV rules before mounting a front plate.
- Use the factory bracket or factory holes when available.
- Choose a vehicle-specific no-drill bracket if there are no factory holes.
- Inspect behind the bumper before drilling.
- Keep parking sensors, radar, cameras, and air intakes clear.
- Use the correct screws and avoid overtightening.
- Replace a mount that rattles, rotates, or cannot hold the plate firmly.
- Seek professional help when the installation may affect safety systems.
Frequently Asked Questions
Can I mount my front license plate on the dashboard?
Usually, a dashboard plate is not a safe substitute for an exterior front plate. It may be hard to read through the windshield and may not meet your state’s mounting rules. Check your state DMV before using this method.
Can I use double-sided tape to mount a front license plate?
You can use automotive adhesive only when the product is designed for exterior use and local rules permit the location. Adhesive can fail because of heat, cold, water, road salt, dirt, or car washes. A mechanical mount is generally more secure.
Should a front license plate be centered?
Centering is common, but the legal requirement depends on the state and vehicle. Some model-specific mounts use an offset position because the center contains a sensor, tow hook, grille opening, or other equipment. The plate must still remain visible and properly mounted.
Can a front license plate block parking sensors?
Yes. A plate or bracket can cover or sit in front of a parking sensor. Follow the vehicle manual and mount instructions. If a warning appears after installation, remove the mount and have the system checked if the warning does not clear.
What size screws hold a license plate?
There is no single screw size for every car. The correct size depends on the vehicle, bracket, threaded insert, and mount design. Use the screws supplied with the bracket or the size listed in the owner’s manual. Do not force a screw that does not fit.
Can I drill into a plastic bumper?
Sometimes, but only after checking the area behind it. Plastic bumpers may hide wiring, sensors, brackets, and reinforcement parts. Use a model-specific mounting guide or have a qualified installer confirm the drilling location.
Conclusion
The best way to mount a front license plate is to use the vehicle’s factory mounting points or a bracket made for that exact model. Before drilling or attaching anything, check your state’s front plate rules and inspect the bumper for sensors and wiring.
Install the plate straight, use the correct hardware, tighten it without crushing the bumper, and test it for movement. If the mount affects a sensor or requires work behind the bumper, stop and use a qualified automotive professional.