
How To Install Car Bumper Clip: Easy DIY Guide
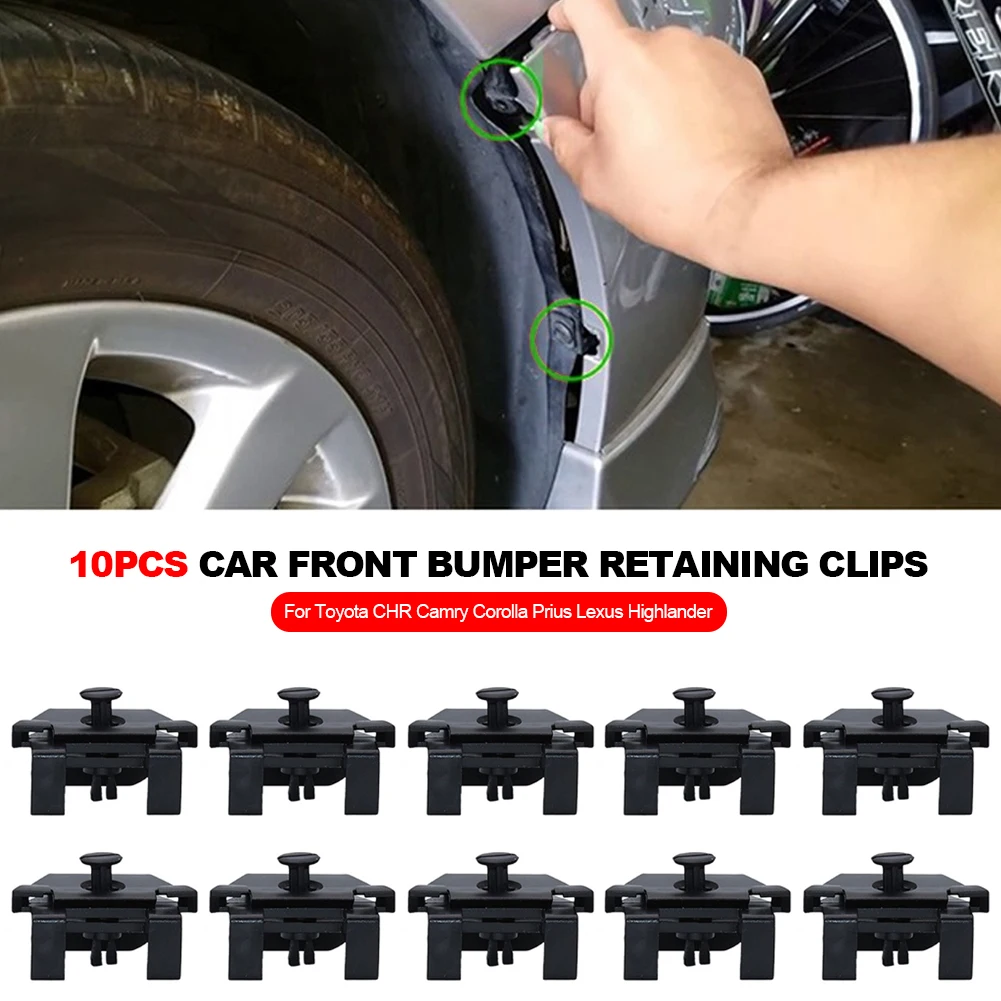
A car bumper clip, also called a bumper retainer, push pin, or trim fastener, holds the bumper cover against the fender, grille, splash shield, or bumper bracket. To install one, line up the bumper holes, press the clip body into place, and lock the center pin or screw. The exact clip shape varies by vehicle, so match the new fastener to the old one and check the vehicle service manual before starting.
This guide applies to most cars and light trucks sold in the United States. It covers common plastic push clips, screw-type retainers, and side bumper clips. It does not replace the repair procedure for a damaged bumper bracket, parking sensor, radar unit, or crash structure.

What Is a Car Bumper Clip?
A bumper clip is a small fastener that joins the flexible plastic bumper cover to the body of the vehicle. It is not the same as the metal or plastic bracket that supports the bumper.
Common names include:
- Bumper retainer
- Push pin
- Push rivet
- Plastic rivet
- Fender liner clip
- Bumper cover fastener
- Side retainer
- Screw rivet
Most bumper clips fall into four groups:
| Clip type | How it works | Common location |
|---|---|---|
| Push pin | A center pin expands the clip legs | Under the bumper and wheel well |
| Two-piece push rivet | The center piece locks into the outer body | Splash shields and trim |
| Screw-type retainer | A screw expands or tightens the clip | Wheel wells and bumper edges |
| Slide or snap clip | A molded tab slides into a bracket | Side bumper corners |
A missing clip can leave a gap between the bumper and fender. It may also cause rattling, loose wheel-well liners, or bumper sag. A clip will not fix a bent bracket or torn bumper plastic.
Before You Install the Bumper Clip
Check the fastener and the mounting hole before you press anything into place. The most common mistake is using a clip with the right head but the wrong shaft size.
You will usually need:
- The correct replacement bumper clip
- A plastic trim tool
- A small flat screwdriver
- Phillips or Torx screwdriver, if the clip uses a screw
- Needle-nose pliers
- Work gloves
- A flashlight
- Mild soap and water
- A clean cloth
A trim tool is better than a metal screwdriver because it is less likely to scratch paint or break the bumper edge. If you must use a screwdriver, wrap its tip with tape.
Confirm the correct clip
Use one of these methods:
- Compare the new clip with an undamaged clip on the same bumper.
- Check the vehicle’s parts catalog by year, make, model, and trim.
- Use the original equipment manufacturer, or OEM, part number.
- Take the old clip to an auto parts store for comparison.
- Check the service manual for the fastener size and location.
Do not rely only on the vehicle’s model year. The same model may use different clips on the front bumper, rear bumper, wheel liner, grille, and lower splash shield.
Inspect the bumper mounting point
Look for:
- A clean, round mounting hole
- A bumper tab that is not cracked
- A retainer bracket that is not bent
- No loose paint or broken plastic around the hole
- No wiring caught behind the mounting point
If the bumper tab is torn, a new clip may hold for only a short time. If the bracket is bent, straighten or replace it before installing the clip.
Prepare the vehicle safely
Park on a level surface. Set the parking brake and turn off the engine. Keep the work area well lit.
If you need to unplug parking sensors, fog lights, cameras, or other bumper wiring, follow the vehicle service manual. Some vehicles require the negative battery cable to be disconnected before electrical work. A vehicle with a front radar sensor or camera may need a calibration after bumper removal or incorrect reinstallation.
Do not work under a vehicle supported only by a jack. Use jack stands on approved support points when access underneath is needed.

How to Install a Push-Type Car Bumper Clip
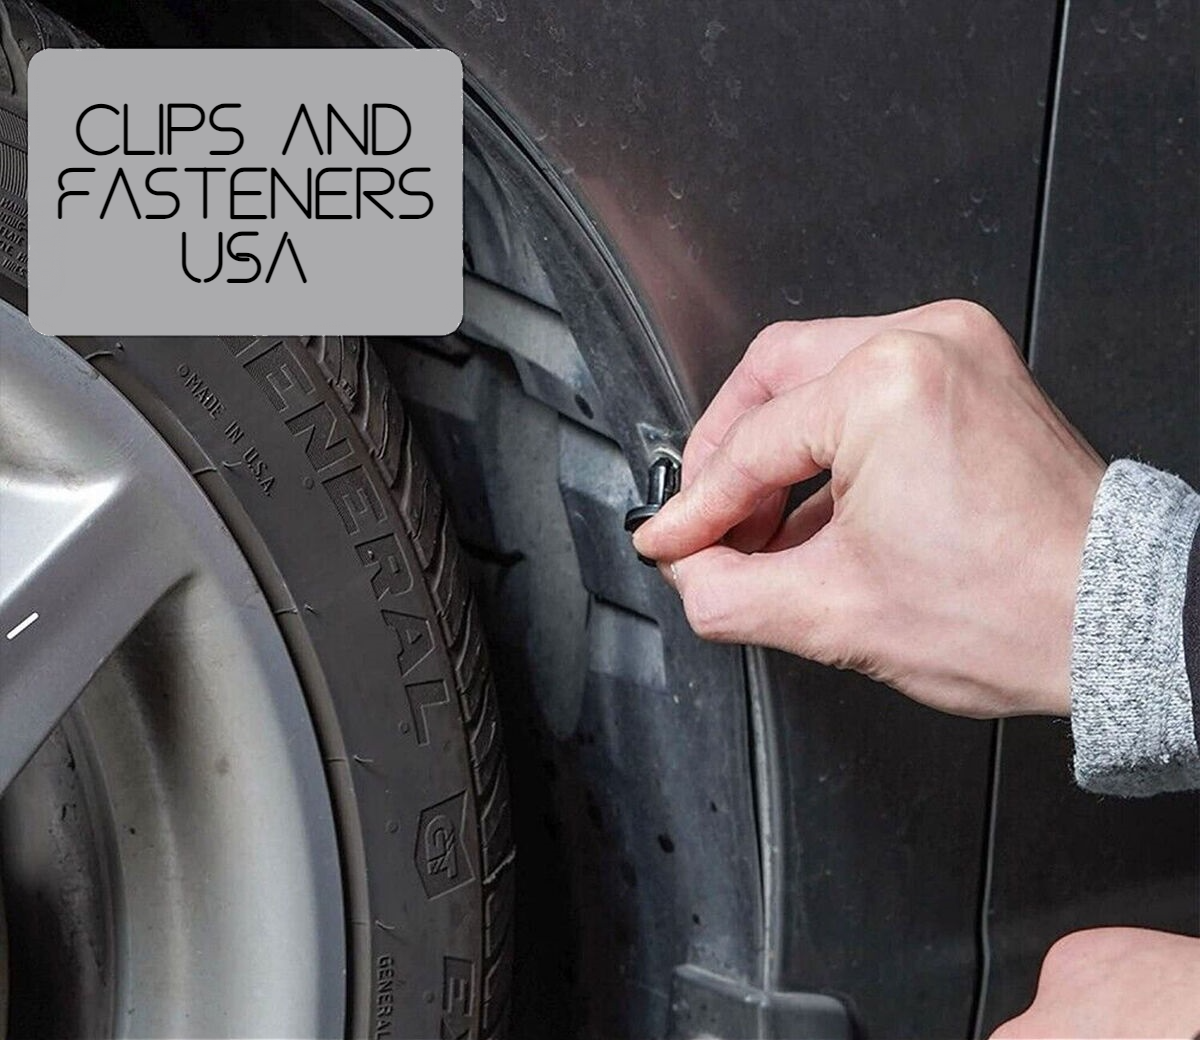
A push-type clip is the most common bumper fastener. It has an outer body and a center pin. The pin spreads the legs of the outer body so the clip stays in the hole.
1. Remove the damaged clip
If the old clip is still in place, use a trim tool to lift the center pin slightly. Then pull out the outer body.
For a broken clip, remove each piece carefully. Do not push broken plastic into the bumper cavity. It may later rattle or block a drain hole.
If the center pin will not lift, turn it gently with a flat screwdriver. Stop if the bumper starts to bend.
2. Align the bumper cover
Move the bumper cover into its normal position. Line up the bumper tab with the hole in the fender, bracket, splash shield, or grille support.
The holes should line up without force. If you need to pull the bumper several inches to reach the hole, the bumper may not be seated correctly.
Check the nearby panel gaps. The bumper edge should sit close to the fender and should not cover the headlamp, grille, or body molding.
3. Insert the clip body
Push the outer body of the clip through the aligned holes. The clip head should sit flat against the top surface.
If the body stops halfway, remove it and check for:
- A bent bumper tab
- A clip that is too large
- A misaligned hole
- Dirt or broken plastic in the hole
- A damaged retainer bracket
Do not hammer a plastic clip into place. A light hand pressure should normally be enough.
4. Lock the center pin
Press the center pin until it is level with the clip head. Some designs use a pin that sits slightly below the head. Use the position of nearby original clips as a guide.
The center pin should not stick far above the bumper. If it does, the outer body may not be fully seated.
5. Check the fit
Gently pull on the bumper near the clip. It should feel secure, with no large gap or rattling movement.
Do not pull hard enough to stress the bumper tab. The goal is to confirm that the clip is locked, not to test its breaking point.

How to Install a Screw-Type Bumper Retainer
Some bumper clips use a small screw instead of a push pin. The screw may expand the clip legs or secure the bumper to a threaded retainer.
- Align the bumper holes.
- Insert the clip body through the bumper and bracket.
- Start the screw by hand.
- Turn the screw clockwise with the correct screwdriver or bit.
- Stop when the clip is snug and the bumper sits flat.
Do not overtighten a plastic bumper fastener. Too much force can strip the screw, crush the plastic, or pull the clip through the bumper tab.
If the screw spins without tightening, remove it and inspect the clip. The expanding section may be broken, missing, or incorrectly positioned.
For a self-tapping screw, use the original screw size when possible. A longer screw can contact wiring, sensors, or other parts behind the bumper.
How to Install a Side Bumper Clip Near the Fender
The side bumper corner often uses a slide-in retainer rather than a simple push pin. This area needs extra care because the bumper edge can crack or scrape the fender.
- Remove the old clip or side bracket.
- Inspect the fender-side retainer for cracks.
- Slide the new retainer into the body slot.
- Align the bumper’s side tabs with the retainer.
- Press the bumper inward and slightly forward or backward as required by the design.
- Install the top and bottom fasteners.
- Check that the bumper edge is even with the fender.
Do not force the side of the bumper straight inward if the retainer requires a sliding motion. Many bumper tabs lock by moving along a guide. Pushing at the wrong angle can break the tabs.
If the bumper corner repeatedly pops out, the retainer may be bent or the bumper tab may be stretched. Replace the damaged part instead of adding a larger clip.

How to Replace a Bumper Clip Without Removing the Whole Bumper
You can often replace one accessible clip without removing the bumper cover.
This works when:
- The clip is visible from underneath or inside the wheel well.
- The bumper tab is intact.
- The holes are still aligned.
- No wiring blocks access.
- The bumper does not need to move far from the body.
Use a trim tool to remove the old clip. Support the bumper with one hand while fitting the new fastener. Install the clip with the bumper in its normal position.
You may need to loosen the wheel-well liner or lower splash shield for access. Turn the steering wheel away from the side you are servicing, but do not work in a position that creates a pinch hazard.
Full bumper removal may be needed when:
- Several clips are missing.
- The bumper is badly misaligned.
- A mounting bracket is broken.
- Wiring or sensors must be repaired.
- The bumper cover has pulled away from the body.
- The bumper needs paint or plastic repair.
If you remove the bumper, label electrical connectors and take photos before disconnecting them. Never pull on a wire to separate a connector.
How Tight Should a Bumper Clip Be?
A bumper clip should be tight enough to hold the cover firmly but not so tight that it bends or crushes the plastic.
There is no single torque value for every bumper clip. The correct value depends on the vehicle, fastener, and location. Use the manufacturer’s service information when a torque specification is provided.
As a practical check:
- The clip head should sit flat.
- The bumper should not have a large gap.
- The fastener should not spin freely.
- The plastic should not bulge around the clip.
- The bumper should not move easily by hand.
- The clip should not crack during installation.
A plastic push clip is not meant to clamp the bumper like a structural bolt. Extra force does not make it safer.

Common Problems After Installing a Bumper Clip
Use the symptom to guide your next check.
| Symptom | Likely cause | What to check |
|---|---|---|
| Clip will not enter the hole | Wrong size or poor alignment | Compare the old and new clips |
| Clip pops back out | Broken tab or wrong clip design | Inspect the bumper tab and bracket |
| Bumper still sags | Missing support or bent bracket | Check nearby retainers and brackets |
| Screw spins freely | Stripped or broken retainer | Replace the clip body |
| Large panel gap remains | Bumper is not seated correctly | Check side guides and upper mounts |
| Rattle continues | Loose liner, broken tab, or loose wiring | Inspect behind the bumper |
| Paint chips at the edge | Bumper was forced against the fender | Refit the bumper and check alignment |
| Parking sensor warning appears | Connector or sensor position changed | Check connectors and follow service information |
The clip keeps popping out
A replacement clip will not stay in place if the mounting hole is too large or the bumper tab is cracked. Compare the loose area with the opposite side of the vehicle.
If the plastic is only slightly deformed, a new OEM-style retainer may solve the issue. If the tab is split, the bumper may need plastic repair or replacement.
The bumper has a gap after installation
Remove the clip and inspect the side guide, upper edge, and wheel-well liner. A bumper can look close in one area but remain out of position because another tab is not seated.
Do not use the clip to pull a badly misaligned bumper into place. Find the reason for the misalignment first.
The clip broke during installation
Plastic clips become brittle with age, heat, cold, and road salt. Remove the broken pieces and use a new clip.
If several clips break in the same location, confirm that the clip type is correct. A clip with a slightly different shaft length or locking design can fail even if it looks similar.
OEM Clips vs. Universal Bumper Clips
An OEM clip is made for a specific vehicle application. A universal clip may fit several vehicles but can vary in head shape, shaft length, material, and holding strength.
| Option | Main benefit | Main limitation |
|---|---|---|
| OEM clip | Best match for the original hole and trim | May cost more or require a parts order |
| Aftermarket vehicle-specific clip | Often easy to find and less costly | Fit can vary by brand |
| Universal clip | Useful for simple, non-critical trim | May not match the hole or panel thickness |
Use the original design when the clip sits near a body seam, visible trim, sensor, grille, or wheel-well edge. A universal clip may be suitable for a hidden splash shield if it matches the hole size and panel thickness.
Avoid using zip ties, wire, oversized screws, or metal fasteners as a permanent substitute. They may damage the bumper, interfere with wiring, or create a sharp edge.
When to Get Professional Help
A simple missing push pin is usually a minor repair. Seek professional help when the work involves a damaged crash component, an airbag sensor, a radar unit, or a camera.
Stop and arrange an inspection if:
- The bumper beam or absorber is damaged.
- The bumper cover will not align after a collision.
- A parking sensor remains loose or gives a warning.
- A driver-assistance warning appears after repair.
- The bumper contains a radar sensor or camera.
- Wiring is cut, pinched, or wet.
- The mounting area is torn from the body.
- The vehicle has damage behind the bumper.
A bumper cover is cosmetic, but parts behind it may affect crash performance or driver-assistance systems. Do not judge hidden damage by the outside appearance alone.

Signs the Installation Was Successful
The installation is likely correct when:
- The clip matches the original style and size.
- The clip head sits flat.
- The bumper edge follows the nearby body line.
- The panel gap looks even on both sides.
- The bumper does not rattle during a short drive.
- No wiring or sensor is trapped.
- No warning light or sensor message appears.
- The clip does not loosen when checked by hand.
After installation, inspect the area again after the first short drive. A loose bumper may become more obvious over bumps or rough pavement.
FAQs About Installing Car Bumper Clips
Can I reuse an old bumper clip?
You can reuse a clip only if it is not cracked, stretched, bent, or missing its locking pin. Many push clips lose their grip when removed. A new clip is usually the better choice for a bumper edge.
What size hole is needed for a bumper clip?
The required hole size depends on the clip. Measure the original hole and compare it with the replacement part information. Do not drill a larger hole just to make a clip fit unless the vehicle repair instructions specifically allow it.
Can I use a zip tie instead of a bumper clip?
A zip tie may work as a temporary roadside fix for a loose splash shield, but it is not a good permanent replacement for a visible bumper retainer. It may leave slack, rub on a tire, or fail from heat and road debris.
Why does my bumper clip keep falling out?
The clip may be the wrong size, the center pin may not be locked, or the bumper tab may be cracked. A bent bracket or oversized hole can also prevent the clip from holding.
Do I need to remove the bumper to replace one clip?
Not always. If the clip is easy to reach and the bumper tab is intact, you can often replace it in place. Full removal is more likely when the bumper is misaligned, several fasteners are missing, or wiring and sensors need attention.
Final Takeaway
To install a car bumper clip, use the correct fastener, align the bumper without forcing it, insert the clip body, and lock the center pin or screw. Check the bumper tab and retainer first. If the plastic is cracked or the bracket is bent, replacing the clip alone will not solve the problem.
For a simple push pin, the repair may take only a few minutes. For a bumper with sensors, cameras, radar, or collision damage, follow the vehicle-specific service procedure or use a qualified repair shop.