
How To Attach Tire Inflator To Air Compressor: Easy Guide
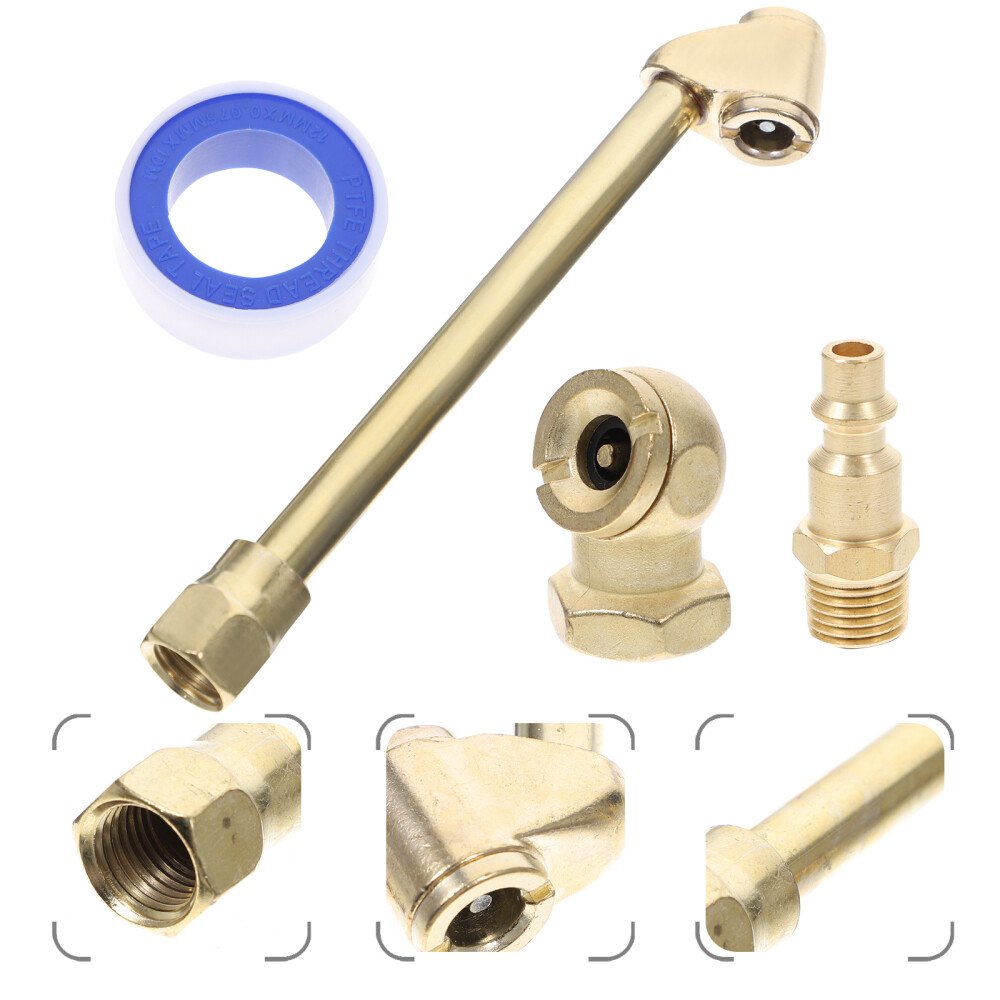
Attach the tire inflator to the compressor outlet, connect the air hose, and test for leaks before inflating.
Learning how to attach tire inflator to air compressor is simple once you understand the fittings and airflow path. The process usually needs an air hose, a quick-connect coupler, and the correct tire chuck. This guide explains each step, common mistakes, safety checks, and practical tips for accurate tire inflation.
What You Need to Attach a Tire Inflator
Before learning how to attach tire inflator to air compressor, gather the right parts. Most problems come from using mismatched fittings, not from the compressor itself.
You will usually need:
• An air compressor with a working outlet
• An air hose rated for your compressor’s pressure
• A quick-connect coupler
• A tire inflator with a pressure gauge
• A tire chuck that fits the valve stem
• Thread sealant or PTFE tape, if the fitting has tapered threads
• Safety glasses and work gloves
Many tire inflators come with a built-in hose and male plug. Others have a female threaded inlet. Check the tool before buying extra parts. The fitting size may be 1/4-inch NPT, 3/8-inch NPT, or another standard.
NPT means National Pipe Taper. These threads tighten as they go deeper into the fitting. A standard air hose may also use a quick-connect plug, but plug styles can differ. Industrial, automotive, and ARO-style fittings may not connect to each other.

Check the Compressor and Tire Inflator
A quick inspection makes learning how to attach tire inflator to air compressor much easier. Turn off the compressor and release any pressure from the hose before connecting parts.
Check these items first:
• Read the compressor’s maximum pressure rating.
• Confirm that the tire inflator can handle the compressor’s output.
• Inspect the air hose for cuts, cracks, or soft spots.
• Check the rubber seal inside the coupler.
• Make sure the tire inflator gauge is clean and undamaged.
• Confirm that the compressor tank has enough air.
The compressor should have a regulator. The regulator controls outlet pressure, while the tank pressure shows how much air is stored. For normal car tires, a regulated pressure between 40 and 100 PSI is often enough, but always follow the tool’s instructions.
Do not assume a higher PSI is better. Excess pressure can damage a hose, fitting, tire valve, or gauge. Vehicle tires should be inflated to the pressure listed on the driver’s door label or in the owner’s manual, not the maximum pressure printed on the tire sidewall.

Match the Air Fittings
The most important part of how to attach tire inflator to air compressor is matching the fittings. The connection must be mechanically secure and rated for compressed air.
Most setups use this path:
-
Compressor outlet
-
Quick-connect coupler
-
Air hose
-
Quick-connect plug
-
Tire inflator
-
Tire chuck
The compressor outlet may already have a female coupler. If it does, install a matching male plug on the hose. If the compressor has a male plug, use a matching female coupler on the hose.
Never force a fitting into place. If the plug does not slide in smoothly, it may be the wrong type. Compare the shape, diameter, and locking groove. A fitting that looks close may still leak or disconnect under pressure.
When installing a threaded fitting, wrap PTFE tape around the male threads. Wrap it in the same direction that the fitting turns into the port. Two or three neat wraps are usually enough. Keep the tape away from the first thread so small pieces do not enter the air passage.
Some fittings seal with an O-ring or rubber washer. These do not need PTFE tape. Tape on the wrong part can prevent a proper seal.

How to Attach Tire Inflator to Air Compressor
Now you can connect the system. Follow this step-by-step process for a safe and secure setup.
1. Turn off the compressor
Set the compressor power switch to off. If it has been running, allow the motor and tank to settle. Release pressure from the hose if needed.
2. Set the regulator
Turn the regulator knob down before connecting the inflator. This gives you a safer starting point. You can raise the pressure after checking the connection.
For a typical passenger vehicle tire, a regulated setting around 40 to 60 PSI is often suitable for inflation. The tire may need less pressure than this, but the compressor must have enough pressure to overcome the tire’s current pressure.
3. Connect the air hose to the compressor
Pull back the collar on the quick-connect coupler. Push the hose plug into the coupler until it clicks. Release the collar and gently pull the hose to confirm that it is locked.
If the connection does not click, stop and inspect the fitting. Do not hold the collar open while using the inflator.
4. Connect the tire inflator
Attach the tire inflator to the other end of the hose. Use the same quick-connect method. Push the plug in firmly and check that the collar returns to its normal position.
If the inflator has a threaded hose inlet, screw the fitting in by hand first. Then tighten it with a wrench. Avoid over-tightening, as this can crack a small brass or aluminum fitting.
5. Test for air leaks
Turn on the compressor and let the tank build pressure. Listen near each connection. A steady hiss suggests a leak.
Apply a small amount of soapy water to the fittings. Bubbles show escaping air. Shut down the compressor, release pressure, and repair the leak before continuing.
6. Connect the tire chuck
Remove the valve cap from the tire. Press the chuck straight onto the valve stem. A clamp-style chuck should lock over the stem. A push-on chuck may need steady hand pressure.
Keep the chuck aligned with the valve stem. A tilted chuck can leak and may damage the valve core.
7. Inflate the tire in short bursts
Squeeze the inflator trigger for a few seconds. Release it and check the gauge. Repeat until the tire reaches the recommended pressure.
Short bursts give you better control. They also prevent the tire from becoming overinflated while you are watching the gauge.
8. Disconnect the equipment
Release the trigger and remove the chuck from the valve stem. Replace the valve cap. Turn off the compressor and release pressure from the hose before removing the hose from the compressor.
This method explains how to attach tire inflator to air compressor without rushing the safety checks. The full process often takes only a few minutes.

How to Use a Tire Inflator Correctly
Attaching the tool is only half the job. Correct use helps protect the tire and gives you a reliable pressure reading.
Start with cold tires when possible. Driving creates heat, and heat increases tire pressure. For the most accurate result, check the tires before driving or after the vehicle has been parked for several hours.
Use the pressure shown on the vehicle information label. You can usually find it:
• On the driver’s door frame
• Inside the fuel door
• In the glove box
• In the owner’s manual
Do not use the pressure molded into the tire sidewall as the normal target. That number is usually the tire’s maximum rated pressure, not the recommended pressure for your vehicle.
Watch the gauge while filling. Some low-cost gauges can be off by several PSI. Compare the reading with a separate, trusted tire gauge from time to time.
If the gauge needle jumps or stays at zero, check the chuck position. The chuck may not be pressing the valve core correctly. A damaged valve core can also cause a leak.

Choosing the Right Compressor Settings
A tire inflator needs both pressure and airflow. Pressure is measured in PSI. Airflow is commonly measured in CFM, or cubic feet per minute.
Most car tires do not require a large compressor. However, a very small compressor may run constantly while inflating a tire. That is normal if the unit is designed for the task, but the motor should not become excessively hot.
Use these general guidelines:
• Set the regulator slightly above the tire’s target pressure.
• Use a compressor with a suitable duty cycle.
• Allow a small compressor to cool between tires.
• Keep the hose short when practical.
• Avoid sharp bends in the hose.
A compressor rated at 2 to 4 CFM at 90 PSI can handle many basic tire inflation jobs. The exact performance depends on tank size, hose length, temperature, and the tire’s starting pressure.
Never exceed the lowest pressure rating of the compressor, hose, coupler, or inflator. The complete system is only as strong as its weakest part.

Common Problems and Simple Fixes
Knowing how to attach tire inflator to air compressor also means knowing how to solve small connection problems. Most issues have a straightforward cause.
The quick coupler will not connect
The plug and coupler may use different profiles. Replace one part with a matching pair. Do not grind, force, or modify the fittings.
Air leaks at the threaded connection
The threads may lack sealant, or the fitting may be cross-threaded. Remove the fitting, inspect the threads, and reinstall it with suitable PTFE tape or thread sealant.
Air leaks around the tire valve
The chuck may be crooked or worn. Reposition it and lock it firmly. If air still escapes, inspect the valve stem and valve core.
The gauge does not move
The tool may not be receiving air. Check both hose connections and make sure the inflator trigger is working. A blocked chuck can also prevent pressure from reaching the gauge.
The tire inflates very slowly
The compressor may have low airflow, the hose may be too long, or the tire may have a major leak. Test the tire with soapy water and watch for bubbles.
The compressor keeps restarting
A small tank or low airflow can cause frequent cycling. This is acceptable for short use, but stop if the motor becomes hot or the compressor exceeds its recommended duty cycle.
The pressure drops after disconnecting
A small pressure change may come from removing the chuck. A large drop suggests a tire leak, valve problem, or inaccurate gauge.

Safety Tips for Tire Inflation
Compressed air stores energy. A failed hose or fitting can move suddenly, so treat the setup with care.
Follow these safety habits:
• Wear eye protection.
• Keep your face away from the valve and couplers.
• Do not inflate a visibly damaged tire.
• Do not inflate a tire with a separated sidewall or large bulge.
• Replace cracked hoses and damaged couplers.
• Keep children away from the work area.
• Never use an unapproved fitting or homemade adapter.
• Do not exceed the pressure rating of any component.
• Stop if the tire becomes hot, distorted, or damaged.
If a tire has been driven while flat, it may have internal damage that is not visible from the outside. Adding air may make it look normal, but it does not repair the tire. Have it inspected by a qualified tire professional.
Industry safety guidance also stresses the importance of using the correct inflation pressure and standing outside the likely path of a tire or wheel component. This matters most with truck, bus, agricultural, and commercial tires, which can store far more energy than passenger tires.

My Practical Lessons From Using Tire Inflators
One mistake I see often is connecting the inflator before checking the coupler type. The user pushes harder, hears air escape, and assumes the compressor is faulty. In most cases, the plug simply does not match the coupler.
Another lesson is to set the regulator before touching the tire. It is easy to connect everything, squeeze the trigger, and add too much air in a few seconds. Starting with low pressure gives you time to learn how quickly your equipment fills the tire.
I also recommend checking the gauge against a second gauge. A tire inflator can work perfectly while its built-in gauge slowly loses accuracy. This is especially common with inexpensive tools that have seen years of vibration or rough storage.
The best routine is simple: inspect, connect, test for leaks, inflate in short bursts, and check the final pressure with a trusted gauge. That routine makes how to attach tire inflator to air compressor feel less like a repair task and more like a safe, repeatable habit.

Benefits and Limitations of This Setup
A tire inflator connected to an air compressor offers several benefits:
• It works quickly for many tires.
• It can serve cars, motorcycles, bicycles, trailers, and sports equipment.
• It provides steady airflow.
• It reduces the need for disposable air cartridges.
• It can use different chucks and accessories.
There are also limits. A compressor may be too small for repeated heavy use. A long or narrow hose can restrict airflow. A basic analog gauge may not provide laboratory-level accuracy.
For emergency roadside use, a compact 12-volt inflator may be more convenient than a shop compressor. For a garage, workshop, or home service area, an air compressor usually gives faster inflation and more accessory options.
Choose the setup based on your needs. The largest compressor is not always the best choice. A reliable compressor with a good regulator, secure couplers, and an accurate gauge is more useful than a powerful unit with poor fittings.
Frequently Asked Questions About How to Attach Tire Inflator to Air Compressor
Can I connect a tire inflator directly to an air compressor?
Yes, if the inflator and compressor use compatible fittings and the pressure ratings match. Most setups use an air hose between the compressor and tire inflator rather than a direct connection.
What size fitting do I need for a tire inflator?
Many tire inflators use 1/4-inch NPT fittings, but sizes and thread types vary. Check the product manual or compare the existing fitting before purchasing an adapter.
Do I need PTFE tape on an air compressor fitting?
Use PTFE tape on tapered male threads when the fitting does not have another sealing method. Do not use tape on compression fittings, O-rings, or the first thread near the air passage.
What PSI should I set on the air compressor?
Set the regulator high enough to inflate the tire but never above the lowest rated component. For many passenger car tires, 40 to 60 PSI at the regulator is a practical starting range.
Why does my tire inflator leak air?
A leaking inflator may have a loose fitting, damaged O-ring, worn chuck, or poor contact with the valve stem. Apply soapy water to the connections to locate bubbles and repair the leak before use.
Can I use a tire inflator on a truck tire?
You can use one if the inflator, hose, chuck, and compressor are rated for the job. Large truck and commercial tires need extra care because they store much more energy during inflation.
Is a digital tire inflator better than an analog model?
Digital models are often easier to read, while analog models do not need batteries. Accuracy depends more on build quality, calibration, and correct use than on the display type.
Conclusion
Learning how to attach tire inflator to air compressor comes down to using matching fittings, a sound air hose, a controlled regulator, and a secure tire chuck. Turn off the compressor before connecting parts, test every joint for leaks, and inflate the tire in short bursts.
Always follow the vehicle maker’s recommended tire pressure. Inspect damaged tires instead of simply adding air, and use a separate gauge when accuracy matters. Practice this process once in your garage, and future tire checks will be faster and safer.
Try the steps on your next tire inflation job, then share your setup or questions in the comments.